Set Sail Studios Font Installation Guide
So, you’ve grabbed a copy of that font you’ve been eyeing up for a while. Hooray!
But now what? Don’t worry, you’re not alone – it’s a question we often get asked. For months I’ve been trying to direct customers to different installation guides and if I’m totally honest – they’re either way too complicated or miss out some important points. So here is Set Sail Studios’ Super Simple Font Installation Guide with a Needlessly Long Title!
Let’s break it down into 2 guides, depending on whether you’re using a Windows or a Mac computer;
Installing a font on a Windows Computer
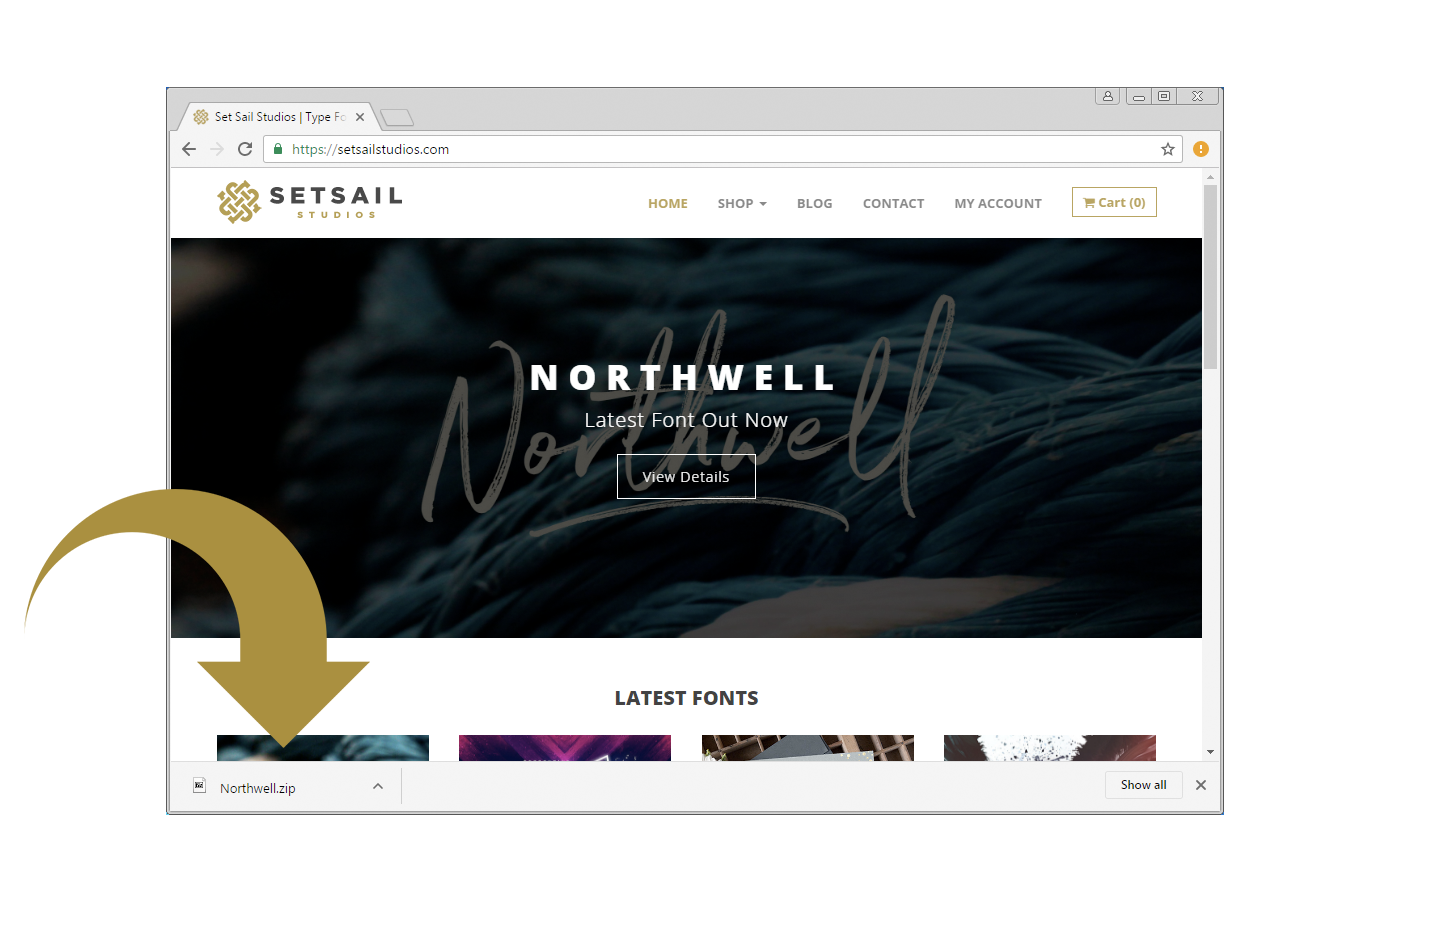
- When you download your font, it will arrive in a .zip (compressed) file. You can usually open this directly from your browser window as seen above (this is using Google Chrome), or drag this downloaded file from here onto your desktop. It can also be found in your designated downloads folder, which by default is located at C:\users\your name\downloads. You can open (extract) the .zip folder simply by right clicking and selecting ‘extract all’.
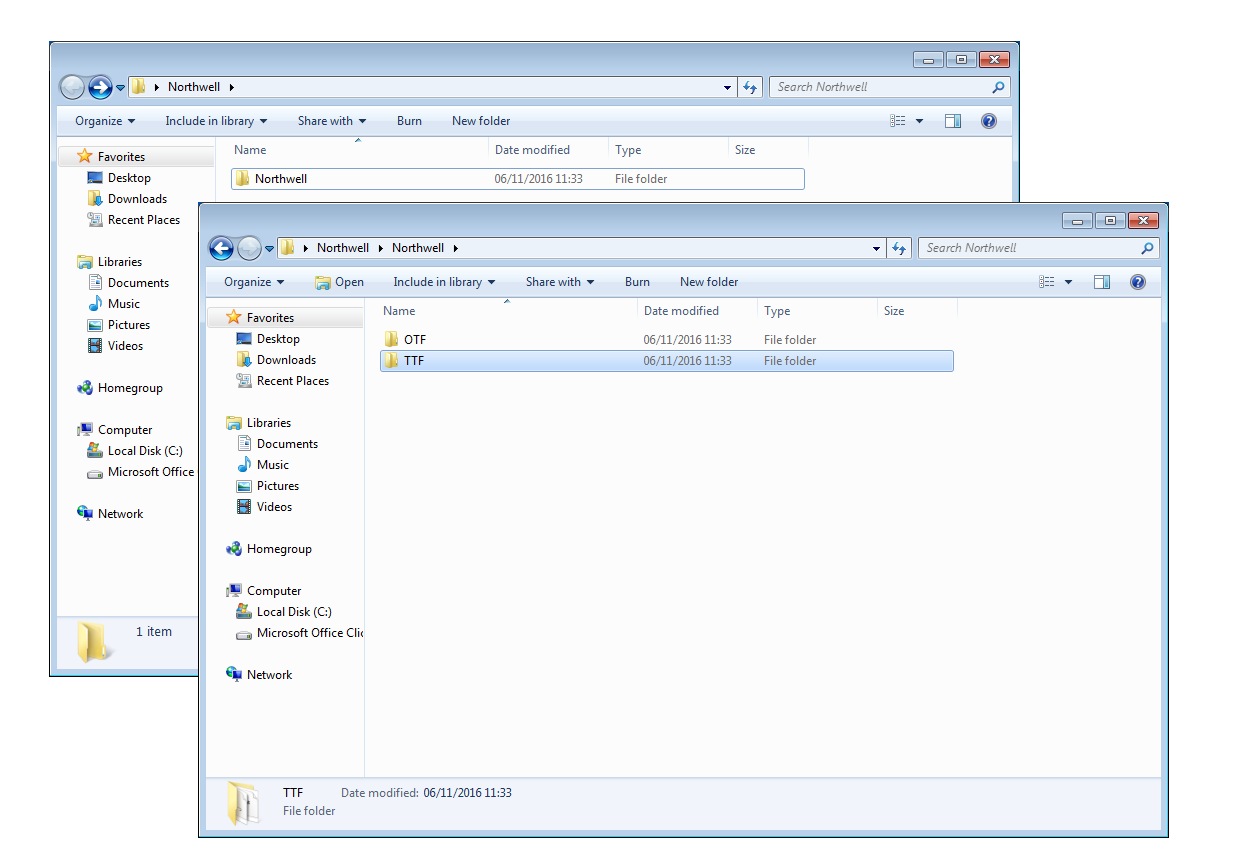
- You should now see a folder containing your font files. You will need to install the fonts in either the TTF folder (sometimes called Opentype-TT) or the OTF folder (sometimes called Opentype-PS) – you only need to install the fonts in one of these folders, not both. There is no difference in the functionality of the TTF and OTF formats, but I like to include both in case of any issues.
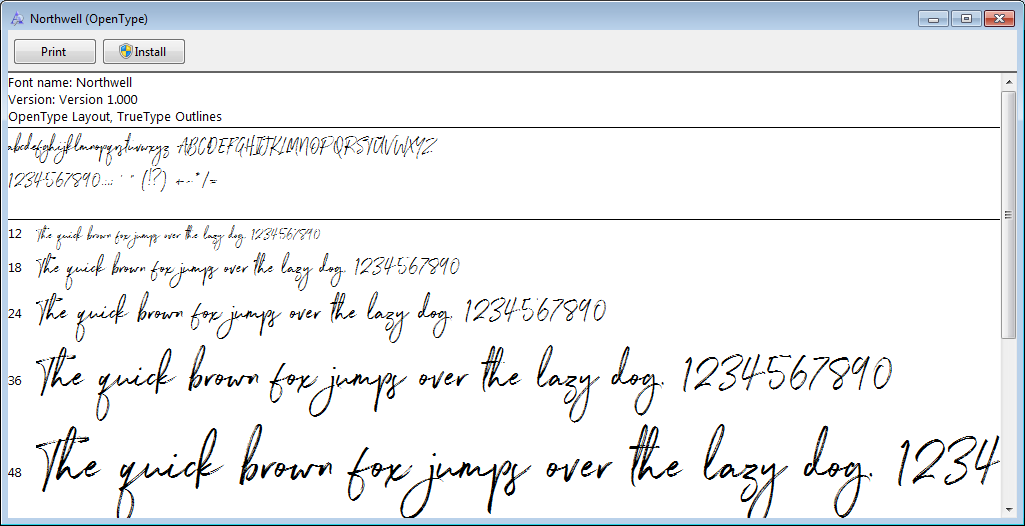
- Double click one of the font files, and an installation window will pop-up as shown above. Simply click ‘Install’ to install it to your computer. You will need to repeat this procedure for any other fonts included in the folder.
- You are now ready to use your new font! You can access it with any well known graphics or word processing software, for example Adobe Creative Suite, or the Microsoft Office software – it will now be available to select from the font menu in these programs. If you’re looking for a free graphics software to use the font with, why not try Inkscape or GIMP?
- Please note if your font isn’t showing up yet in a font menu, we recommend restarting your computer to allow it to register the new changes.
Installing a font on a Mac Computer
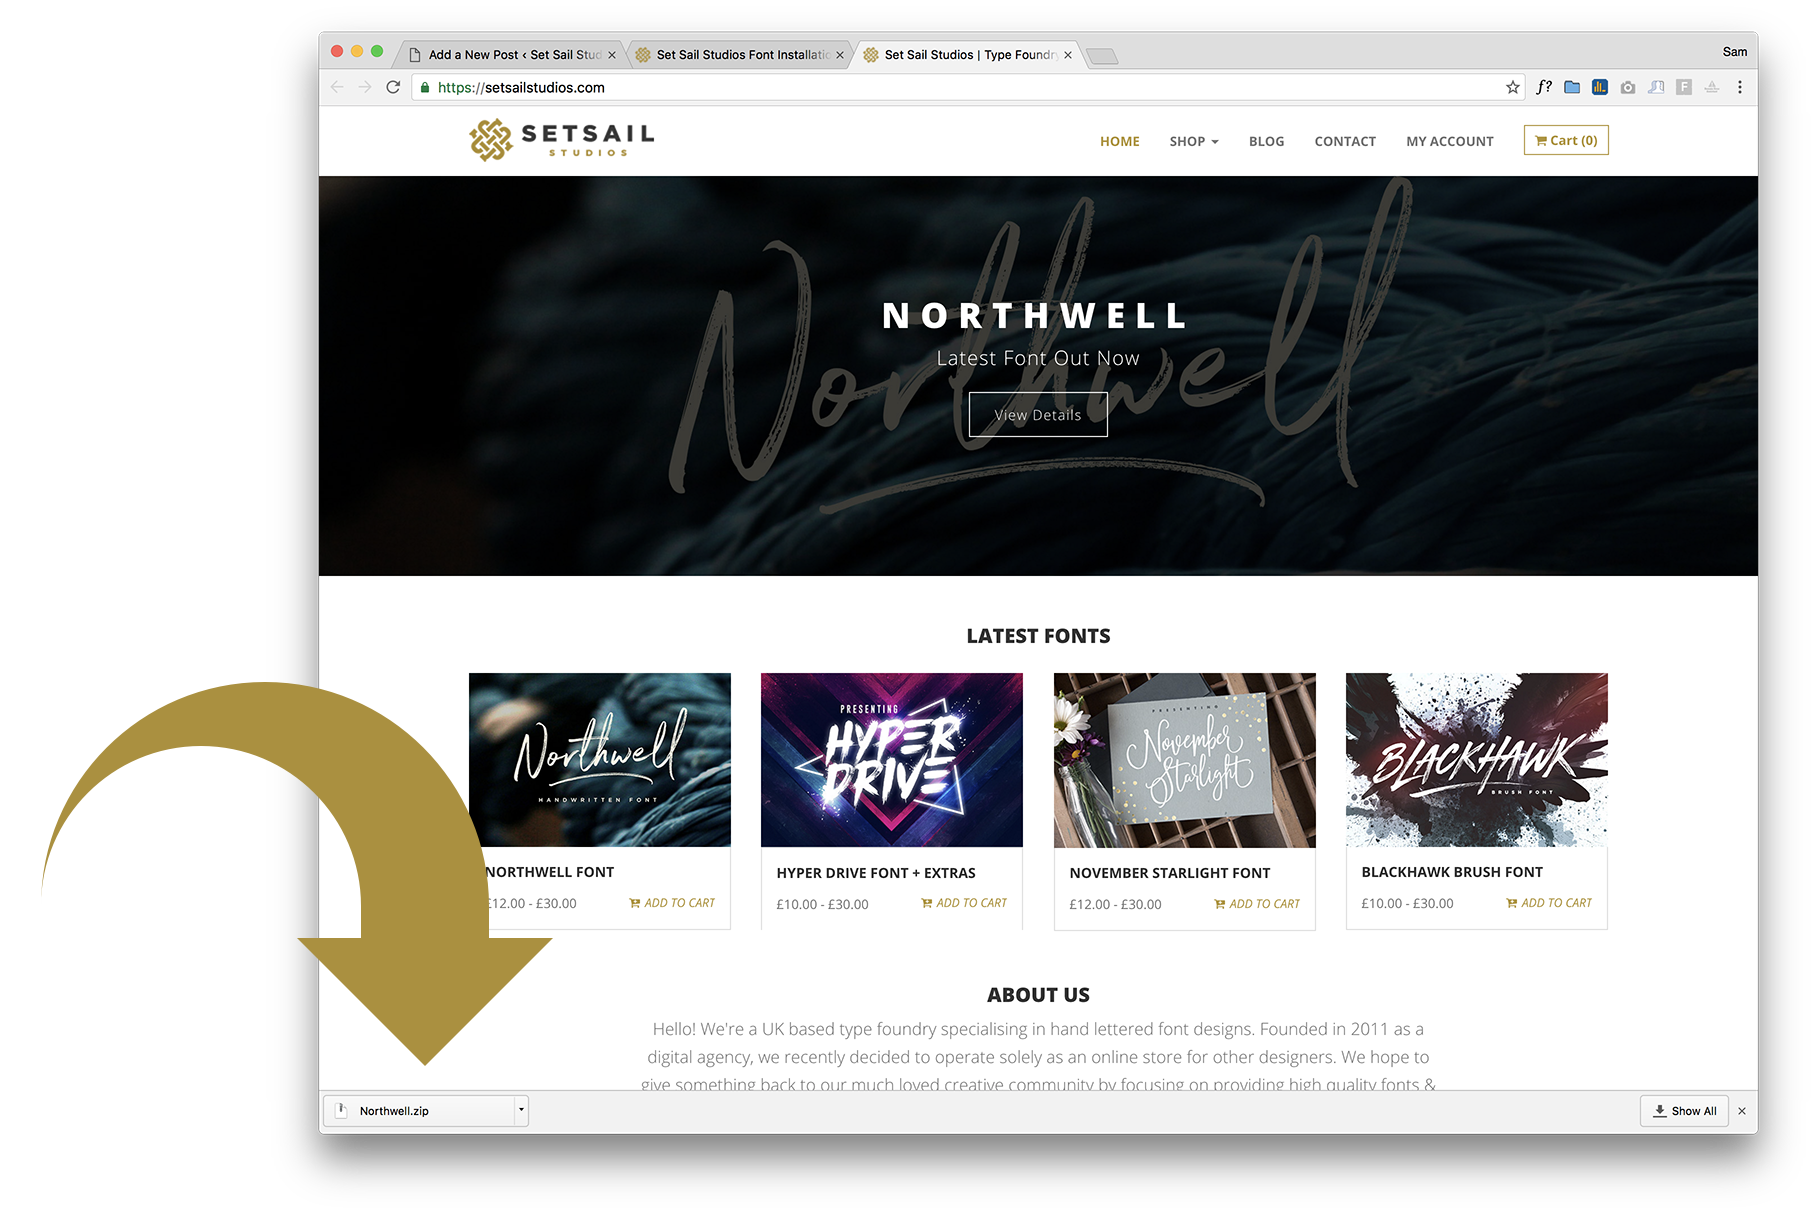
- When you download your font, it will arrive in a .zip (compressed) file. You can usually open this directly from your browser window as seen above (this is using Google Chrome). It can also be located in your designated downloads folder. By default, the Downloads folder is available in the Finder sidebar and in the Dock. You can open (extract) the .zip folder simply by double clicking the file.

- You should now see a folder containing your font files. You will need to install the fonts in either the TTF folder (sometimes called Opentype-TT) or the OTF folder (sometimes called Opentype-PS) – you only need to install the fonts in one of these folders, not both. There is no difference in the functionality of the TTF and OTF formats, but I like to include both in case of any issues.
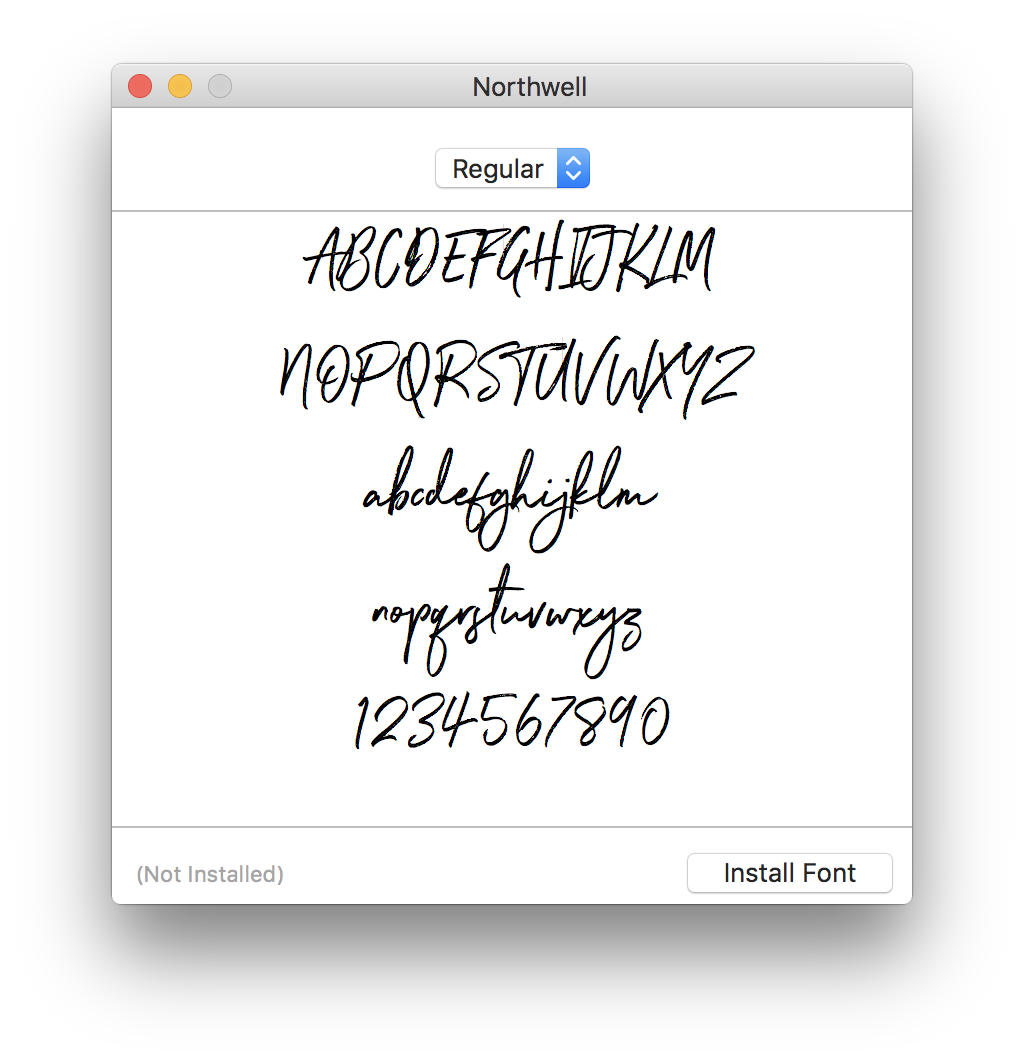
- After double clicking one of the font files, you will see an installation window as shown above. Simply click ‘Install Font’ to install it to your computer. You will need to repeat this procedure for any other fonts included in the folder.
- You are now ready to use your new font! You can access it with any well known graphics or word processing software, for example Adobe Creative Suite, or the Microsoft Office software – it will now be available to select from the font menu in these programs. If you’re looking for a free graphics software to use the font with, why not try Inkscape or GIMP?
- Please note if your font isn’t showing up yet in a font menu, we recommend restarting your computer to allow it to register the new changes.
That’s all there is to it guys! However if you run into any trouble please feel to get in touch and we’d be happy to help 🙂
Happy font-ing!
– Sam @ Set Sail Studios
I tried all this, when I go to open the tif folder it show me the fonts but then when I click on the font I get the general info, SIZE, CREATED, MODIFIED, OWNER, GROUP checksum info SHA1, SHA256, MD2, MD5 and Hex Dump. it did not give me the install option
Hi Christopher,
It sounds like you have a third party app assigned to open font files. Instead of double clicking on the font file, try right-clicking and then choosing ‘Open With’, and then select ‘Font Book’ (assuming you’re using a Mac computer). If ‘Font Book’ isn’t an option, select ‘Other…’ and then find ‘Font Book’ in the list of Applications. This should then open an installation window for the font.
Let me know if that solves it.
Cheers,
Sam
Thank you so much for taking the time to share this information. I’ve bought fonts from Creative Market and had no idea what to do. I can’t thank you enough!
Sue
Hi Sue,
Thanks for your feedback and that’s great to hear you found it useful! It definitely makes these blog posts worthwhile 🙂
Sam
Hey I bought the original Madina font now there is a clean version how do I get the clean version too?
Hi Jamie, thanks for your purchase! Of course – If you could forward your purchase receipt to me at sam@setsailstudios.com, I’ll get the updated version straight over to you! 🙂
Hey Sam,
I bought your Northwell font yesterday and didn’t know how to get access to the marks that were already included in the download. I’m using a program called Canva. Not sure if you know anything about that. It had no issues uploading the font but didn’t know about the marks.
Hey Moria, thanks for purchasing 🙂
Did you mean the swashes/underlines? These are included in the download as their own separate font called ‘Northwell Swash’. If you open the TTF folder in your download, you should see ‘Northwell Swash.ttf’. Upload this font to your Canva brand kit, and then simply type any a-z character in the ‘Northwell Swash’ font to generate a swash/underline.
I hope that helps but feel free to drop me an e-mail at sam@setsailstudios.com if I’ve misunderstood and I’d be happy to help further!
I just purchased Northwell font to use in my new logo. For some reason the font doesn’t look normal in Photoshop (CC 19.0). The letters are script-like but separated. I checked in InDesign and a few other apps where they work beautifully. Any reason why they are not working properly in PS? Thanks!
Hey Alan, thanks for your purchase! It sounds like you just need to reset the tracking (letter spacing) in Photoshop to 0. You can do this in the Character panel (Head to Window -> Character if you don’t see it open), and change the tracking value (the ‘VA’ icon) to 0. Here’s a screenshot to show where that is exactly; https://setsailstudios.com/wp-content/uploads/2018/01/tracking.png. Let me know if that solves it!
– Sam
Hi Sam – In PS CC17 I can’t seem to turn off the anti alias, it’s creating a much more ‘smoothed out’ look. Any ideas on how to turn it off? Thanks!
Hi Amanda! You can turn off anti-aliasing in the Character panel (Window -> Character). In the bottom-right corner there is a little drop-down menu for anti-aliasing, to turn this off you can select ‘none’ from the drop-down menu. Here’s a screenshot which shows where that is; https://setsailstudios.com/wp-content/uploads/2018/05/aa.png
I hope that helps!
Hi there, would I be able to test the font before purchasing it?
Thank you.
Nicola
Hi Nicola, absolutely – you can test drive all of my fonts at the typetester here; https://setsailstudios.com/typetester/
How do you use this and edit the font into a logo? Which Program should I use? Please let me know! Thank you so much!
Hi Jessica, thanks for the comment! Once the font is installed you can use it in any graphics program you have on your computer – and there are loads out there which allow you to create a logo! Personally I recommend using Adobe Photoshop or Adobe Illustrator to design a logo, you can get free 30 days trials for both of these programs at http://www.adobe.com/downloads, and there are plenty of tutorials on YouTube which show you how to create a logo from a font using these programs! Alternatively, there are many free graphics programs such as GIMP & Inkscape, and there are also more simple online graphic tools such as PicMonkey which allow you to create your own graphics from fonts installed on your computer – all within a web browser. Again if you’re looking to use one of these other programs, just head to YouTube and search how to create a logo with it.
Lastly you could simply send the font to a freelance designer to create something for you, if you’re looking for a professional package. If you wanted a look at some of my recommended designers, check out this list! https://setsailstudios.com/recommended-designers/
I hope that helps and good luck! 🙂
THANK YOU for these simple instructions for a novice like me!
No problem Stephanie! I’m really glad you found it helpful 🙂
I purchased the liquid gold font for procreate and was wondering how I could get the other colors.
Hey Patrece! It’s pretty straightforward to change the colour in Procreate – here’s a quick video showing how; https://youtu.be/-m9g89lpCbY
Hey Sam,
I use G Suite for all my office based programmes. Do you know if there’s a way I can add my newly-bought fonts there to use? They were used by my Designer for my business rebrand so need to bring them through all my documentation.
Thanks a million!
Hi Kelly, thanks for your comment. Unfortunately there’s no way that I know of to add your own custom fonts to Google apps – they only provide their own font library. Sorry I can’t be of more help there!